Showing posts with label handmade. Show all posts

Wednesday, November 25, 2009

Chandelier recycled and saved from garbage

I found some other pictures of a DIY that I'm very  proud of. So here it goes: almost 2 years ago, my coworker Melissa, wonderful young girl btw, gave me the old brass chandelier that her mother was about to toss in the garbage. She remembered that I mentioned  how much I would love to have a chandelier for my bedroom so she brought it to me for free, just like that! I love that girl! It was somewhat stained with white paint, several  "candle holders" were partly broken and some of the christals were missing. I wasn't quite ready for a DIY action at that moment but I was very happy to have it. Can you believe that I was finaly so lazy that I bought a little chandelier from the store for my bedroom? I'm so ashamed, but if it can be an excuse - it didn't really cost that much. Talking about karma! It wasn't meant to be my chandelier. Then my daughter moved in another apartment and she needed a ceiling lamp for her bedroom. What was she supposed to do? Poor thing, she had one of this "breast with nipple"-like ceiling mount lamps already fixed in her bedroom. So I took pity on her and offered to restore the chandelier that I was saving for my bedroom. The result is simply breathtaking, for me anyway. See how it looks in front of her charcoal gray wall:
I used some silver spray paint, didn't even bother to prime it, we found some nice fake bling-bling in the dollar store to replace the missing christals - you can barely tell the difference. I was somewhat worried about the solution for the broken "candle holder" parts but my daughter wanted me to let them uncovered and to just spray paint them. So I did it her way and guess what? It looks just lovely, it adds a little surprising industrial touch to it.

BTW, it looks a bit yellowish in the picture but it's really silver painted. We were so busy that day that I completely forgot to take the  before pictures. Here is what it looked like approximately before the upcycling:

Share/Save/Bookmark

Tuesday, November 17, 2009

Thread rack from Ikea bathroom shelf

My digital camera is definitely dead, even rice 'spa' couldn't help. I went over my pictures on the computer and i found another little project that I completed two weeks ago. I needed some kind of a thread rack for my little sewing room, mainly for the large serger  thread cones. They needed desperately to be orderly stored. And as my daughter offered me her Ikea bathroom shelf named 'Songa' I was happy to accept it. It didn't need much work, the only thing that bothered me were the black metal supports - I wanted to spray paint them silver for better fit with my existing equipment. It took me no more then 10 minutes to prepare and to spray the supports. It was howewer rather tricky to spray paint each side of the support, they are so thin, nearly impossible to work precisely. Here is the end result:

I like it, it's installed directly over my work area, very easy to reach. I'll show you my little sewing room very soon, I have some things to finish this week in it. And then I would like to start next week to make some lovely things for my brand new Etsy shop, hopefully still in time for Christmas! There are allways people out there who do some 'last minute shopping'. I allready have the fabric and I'm working on the little collection of warm, wintery, snuggly...well, you have to wait till next week to see what am I preparing, sorry...


Share/Save/Bookmark

Sunday, November 15, 2009

Recycled glas jars finished

My digital camera is taking a rest in a bag of rice since the 'swimming in the cup of coffee' accident. Battery and memory card sleep as well in it. I was told that rice could absorb the humidity and my camera might work again after all. We'll see...I'll wait till this afternoon to try it.
Since I already downloaded some photos from it before the accident  I'm able to give you a follow up on the blackboard spray paint project. This is the finished project with labels:


I was looking for this paint since I saw it on Sonia's post and I found it finally in a hardware store for 5,99$. Not so bad... I already had four big nice glass jars that I saved for a project initially meant to make a DIY version of the lovely Ikea 'Burken' jars:


Finally, I decided to combine both ideas and to make the jars as planed: silver spray paint the lids with addition of the blackboard spray labels. In the beginning of the project I wanted to prove (to myself?) how smart I am and I tried to treat the four jars at the same time with spray paint. As I started to elaborate the tactic to do so, I realised that I was on the way to fail miserably and to loose a great amount of time without getting neat results. What can I say, I couldn't hide it from you, I hope to spare you the embarrassment if the same idea should cross your mind.

 If you have an impression that I was a bit impatient, you're absolutely right. In the end, I got a nice result with masking tape. Didn't care to cover it all but it was not so difficult to handle. If there are some spills you can just wish them of with a sponge or cloth right away. Even if you not see it while it's still wet, don't worry, you can scrape it off using a knife or a cutter. Even if I like the result very much I still would like to add something on the lid for the more realistic 'Burken' effect. What could I use? Any ideas out there?
Share/Save/Bookmark

Tuesday, November 10, 2009

On Color Again

I knew I needed an excuse before presenting the today's subject! And guess what? I found the perfect one:

Phew, I can proceed now, merci Monsieur Léger! This is exactly how I see it and feel it too. What I wanted to show you today is a glimpse on the November issue of Burdastyle. As you already know, I'm a hobby sewer, a very good one I must add, but more about it later. For practicly all my projects I only ever used German sewing magazines with patterns, Burda and Neue Mode (the latter is no more published). So even if I now live in North America, I wanted to feel the joy of receiving my Burda each month so I subscribed to it, more precisely: it was my DH's present for my birthday - he only wanted me to stop wining, really. So now I get to enjoy each month the newest Burda in German language. I received my November issue last week and as I was about to take it out from the envelope something shiny blended me. I couldn't believe my eyes: it was the most beautiful and the most kitschy (I love kitschy!) Burda cover ever! Everything was in red and gold, shiny and glossy, very smooth to touch. I stared at it for the moment, reluctant to open it, fearing that the beauty of it would vanish. Only after a minute or so of staring with my mouth open (I'm easy to impress) I came to my senses and could browse it. Ah, everything in red, plummy blue and purple...

Now I only have to find an occasion for wich I should make one of those fiery beauties. Any suggestions? Or maybe invitations? I'm waiting...
For those who, like me, enjoy those kind of things I prepared a teeny-weeny preview (in purple) of the December issue. Enjoy!


Share/Save/Bookmark

Friday, November 6, 2009

Lovely November morning (for DIY post)

As I was preparing  my coffee this morning I couldn't help but wonder: is it possible to have such a long beautiful autumn, sunny and temperate even in November?  So I grabbed my camera and took a picture of my kitchen window bathing in the morning sun, with African violets still blooming.

So, and now back to work! I wanted to share with you an idea for reusing, or recycling, an unusual object. For quite some time now, i had in my shed an old utensil basket from my old dishwasher. It was in good shape and I stored some little things in it. Then, last weekend, as I was cooking in my all but practical and ergonomic kitchen, I reached for the olive oil bottle so clumsily that several bottles with oils, vinegars and sauces started moving very quickly, and in the same time, in the direction of my head. I must have used some cool move at that moment because somehow I managed, after wrestling with diverse bottles for several seconds, to save them from falling. On my head. I was furious at my kitchen even if it was entirely MY FAULT. And here is why: when we bought our fist home over 4 years ago, I didn't like the existing kitchen at all. Not one bit. But we bought the house because it had some nice features for our two teenagers and that was very important at the time. And even if I dreamed all my life of having a nice kitchen and hoped to get it with our first house, I said to myself: OK, calm  down, you can function in it for a while, see what is wrong with it and renovate later. And I did it. Except renovating, that part isn't done yet, I'm still in the dreaming phase because of  'peanuts'. And you should know: I really love cooking for my family, love making them happy when the smell of their favorite meal starts to spread from the kitchen and they come running to see when it'll be ready. Back to reality, there is not one day that I don't hate my kitchen, it is so small and very badly organized space wise. And the list goes on, it's very long, believe me. I'll save it for another post dedicated to my kitchen. See?! There is no stopping me when I start talking kitchen. Anyway, back to my DIY. Having survived the accident with my oil bottles, I started to think of a rapid solution for them. What you don't know: all these bottles were placed in the cupboard over my old integrated oven. And no, there was no other solution for them at the time. Last week, as I was finalizing some prewinter rearranging in my shed with my DH, I saw my old dishwasher basket and the light went on! Back in the house, I put my bottles in it - perfect! So I took some very simple loop screws and fixed it on the inside of the cabinet door beneath my stove without having to change it a bit. And without using any tools. Ta-da!!! Look at this smart, simple, free, practical, ecological, green solution:

This basket has a grip in the middle, very practical for cooking outside in the summer. Just grab and go, everything is ready. Here are some more pictures:

Share/Save/Bookmark

Thursday, November 5, 2009

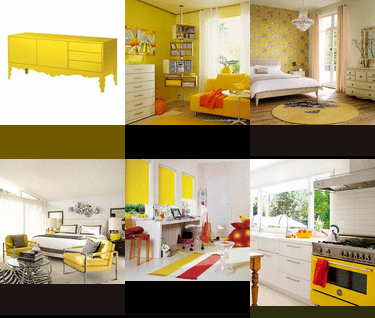
Yellow Cure

Earlier this week I promised you another post on my severe case of color craving. I'm self medicating at the moment with the "moyens du bord" as my friends Quebecers say, meaning with the limited means at my disposal. In this case I brought home some nice branches from my autumn stroll and I used on them the rest of the yellow wall paint I had. Let me tell you one thing ( preferred sentence introduction of my DH, btw): painting those willowy branches slowly with a brush  dipped in sunny yellow paint was the best meditating activity I had in long time...

After two coats of paint, with the benefits of two free sessions of meditating, I put my yellow cure in the green guest room saving it for those cold, stormy winter days...

And if you're curios to know what the object in stripes is, you'll just have to ask me ;-)

Share/Save/Bookmark

Another follow up: birthday cake

The frog on the strawberries birthday cake that I made for my daughter didn't survive very long but I'm not sorry for him, it was his destiny. I finally got some news on his karma, take a look:

Don't you love making people arround you happy? I sure do!

Share/Save/Bookmark

Wednesday, November 4, 2009

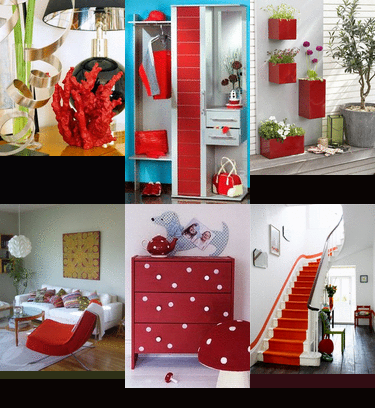
Severe case of color craving...

... or how else to explain my constant desire to see more bold colors around me and on me too. I have to say that even if I never really was I gray mouse in a large sense of the word, bold colors never were an option when choosing clothes for me, paint for my walls or even just little decoration objects like vases, pictures etc. The only exception to the rule was the wall we built in our new house in 2005 that I decided to paint gorgeous velvety dark red:

 I was literally in love with this wall for months because of its color and I looked forward to get home each day after work to enjoy it, my first wall in color ever! But then, about two years ago I suddenly, and irresponsibly, decided to buy a pink shirt for me. And I'm already a little far from twenties if you must know. Anyway, I surprised myself by this choice and apparently the people who know me were surprised too, judging by the comments of my children, my husband (are you sure you want to wear THIS color?), colleagues (hey, how surprising, looks nice on you, you should be wearing these colors more often...). And from this moment on I somehow started to by green, purple, red clothes and to mix them with my more neutral wardrobe (lots of black of course, brown and gray...no blue) And I could swear those colors changed not only my looks, they influenced my behavior also. I started to feel more perky, energized and, why not, younger too. And just when I thought it was over, it started to get over to my house. I suddenly found myself taking home loads of paint chip samples from hardware stores, looking trough inspirational pictures everywhere, from books through magazines to the Internet. And finally this week I started to treat my color deficiency with a heavy dose of bright, glossy cardinal red:


The color is of course even more beautiful than on the photo, I think I'm not so good yet with my camera and light. This is a little piece of furniture that I bought at Salvation Army for my entry area but it looked quite blah when I placed it against the, you guessed, beige wall. Originally it was grayish beige-white:

And as I looked around to find an idea I saw my new red love: Kitchen Aid mixer that my children gave me as present for my important (ahem) birthday. I knew instantly, it has to be red! I gave it two coats of paint and it became hot and sexy at once:


Not the best photo but I have to learn how to make good digital photos with a crappy camera...I'll let it dry one more day before adding a bowl for keys and change and other necessary stuff.
So, isn't it obvious that I have to continue the treatment with some other color doses? More about it in the tomorrow's post.
Viva la Color Revolution! 


Share/Save/Bookmark

Tuesday, November 3, 2009

Follow up: first Halloween costume

Remember the costume that I had to make for my colleague son's first Halloween? I didn't have a chance to see him in person but his mother sent me a photo and I find him a-do-ra-ble!!!

I'm really pleased with how the costume turned out and I sure hope I'll have the opportunity to make another for him (and his little sister?) next year. Congratulations Noah on your first "Boo!" experience!
Share/Save/Bookmark

Thursday, October 29, 2009

Blackboard spray paint labels DIY

Curiosity is my middle name, really. I love learning new things, that's why I love navigating the Blogger Sea: there are so many talented people out there! Just yesterday I stumbled upon Sonja's blog and  found the idea for my next craft project. She used blackboard spray paint to transform her tins and jars - simple and stunning! She was nice to allow me to present her work on my blog. Here is the picture of her storage cans with rewritable blackboard labels:

Lovely, isn't it? I can imagine it would look very nice on the glass jars also. Sonia had another idea for the glass jars:
 
 One thing is sure: I have to find this blackboard spray paint subito-presto, I have some very nice glass jars waiting behind my back...
You can find the instructions when you click on pictures, or find those and many other nice projects on her blog at craft-werk.blogspot.com. Enjoy!

Share/Save/Bookmark

Wednesday, October 21, 2009

Cute (and scarry, brrr...) Halloween decoration

When little French children await impatiently an event like Christmas or Halloween they often count time left in "dodos" - how many times they got to sleep till the day "X". Encore 3 dodos, encore 6 dodos... in our case, "encore 9 dodos" till Halloween. Well, there is plenty time left for both, parents and children to craft something scarry for this day. I stumbled upon a lovely Cathie Filian blog "How To Be Domestic" and found a cute little Halloween project just for you :

Cathy creates, produces and co-hosts the popular lifestyle show Creative Juice on DIY Network and HGTV. You can find her project, and many others, at this link : Halloween: extreme glitter skull

Happy crafting !
Share/Save/Bookmark

Sunday, October 18, 2009

Decorating with (Love) Letters

The Apartment Therapy website is one of my preferred interior design sites and I read it daily for inspiration. In one of their October posts they presented decor inspired by old letters, postage stamps etc.

I immediately thought of my old letters that I framed in a shadow box and decorated my bedroom wall with it. Those are my long lost young girl letters that my sister sent me to my birthday last year. What a surprise it was ! She found them in the attic of my parents house, carefully hidden behind one of the wood beams. The letters were bound with the red ribbon exactly as I left them there long time ago. And even though I was very curios to read them again - I somehow couldn't do it. And there is also my first love letter ever among the others...
So I took the letters and put them carefully in a shadow box that I had for another project :


Share/Save/Bookmark

Saturday, October 17, 2009

His first Halloween costume ever

Would you believe that I am about to sew my first Halloween costume in my very long carrier as hobby sewer ? First of all, where I grew up, we didn't have this holiday at all ! Last week my coworker / friend asked me if I could sew a costume for her 3-year-old son Noah, she wanted to have something more original then things she can by in stores, especially for his FIRST Halloween costume EVER ! I almost jumped for joy ! Of course I will : I love kids, I love sewing, I love Halloween, I love creating stuff of all sorts...
So I send her some pictures with the propositions of costumes for which I have a pattern. She picked this one with her son:
 
This pictures are rather small, sorry, they are the only ones I have. The costume and the pattern are from the Spanish sewing magazine called Patrones, issue 34 from January 2006. Aren't they adorable ?! You really should see all the others too, soooo cute, incredible ! I can post some other pictures,  if you are interested just tell me.
Well, needless to say, I went RUNNING to the fabric store to find all the necessary material (as if I needed a reason to yet another trip to fabric heaven...). I'm so excited, here is what I found :

  I especially love the printed one, I am going to make that lovely Chinese hat from it. Well I love it so much I am going to create Halloween candy bag in form of a Chinese lantern. This is what I'm using as an inspiration :


What I didn't find is a decorative ribbon to sew around the seams of the costume. We don't have lots of choices in my city and I can't order on the Internet because of the time / cost factor. I have only 25 $ to spend for all the materials so I have to find a solution for the ribbon that costs less then 5 bucks ! Sigh... Would you happen to have any ideas on this ? I would be really grateful for any helping suggestion of yours...
I'll keep you posted on the advancement of this project, there are more pictures to come next week!
Share/Save/Bookmark
Related Posts Plugin for WordPress, Blogger...